


A place in the sun; part the second

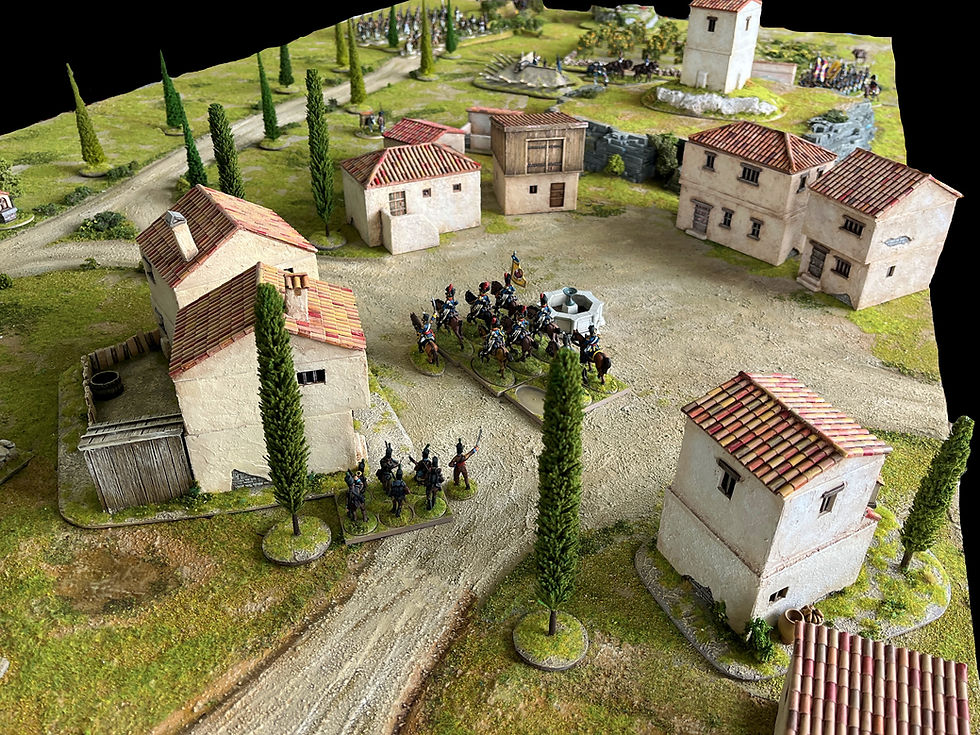
It's been confirmed that I'll be putting on a participation game at next years Salute (Salute 54) and given it will be a peninsular game some more building bases will be required. There will be several of these posts leading up to the show, including quite a few of the fort that will be built (but more on that later).

This particular build is of a farm house that's had some extensions added to it over the years and it could be used on a village or on it's own as an objective for a raid etc.

This building base included the following items; PN01 (with a chopped roof), PN02 with a chopped roof and walls), the top floor of PN13 and PN03. The angle of PNo2 was kept shallow as too much can look, well, too much. I used a Japanese wood saw to cut through the walls as it's very good at cutting through resin.
It's always a good idea to keep the builds fairly compact as this helps for storage but also it helps that the buildings don't dominate the battlefield.

As with all the accessible interior builds, I glued some 2mm grey board to the underside of the upper floors and roofs. This is usually cut 1mm smaller than the interior below as a little bit of 'give' is usually a good thing.
The wooden barn overhangs PN01 a fair bit so I added some 3mm balsa strip with regular spacing, again, about 1mm away from the lower wall. This helps to encapsulate the wall and makes sure the barn won't move unless lifted directly off.

A new door had to be added as the original was miscast (as are pretty much all of the builds that I use for myself). Simple balsa wood planks with two cross beams were glued separately and when dry tacked in place with a bit of superglue (applied with a cocktail stick). More glue was added once the initial application had gone off.
The roofs were cut to fit, again with the Japanese saw and 2mm grey boards was added underneath. A bit of tweaking was needed to make a snug fit.

Typical basing was used, namely 3mm mdf, chamfered with filler added where needed. In particular, it was needed around the lean to as this has a base of it's own. One option was to remove the base but seeing as it's going to be a wood store I thought raising it a little wouldn't hurt (allowing the water to drain away).
It's little details like this that help to make the buildings a bit more realistic and having studied architecture for a long time, these sort of things almost come as second nature.

With the filler dry my usual ground cover was added (brown acrylic decorators caulk and fine sand) and applied with a spatula. It has a sharp rounded point on it which is helpful for getting into corners. The advantage with the caulk is that it can be wiped off if necessary.
Six colours were chosen for the roof tiles on top of the base coat and a random selection of tiles were painted in each colour. The darker and lighter tiles are usually used less in number than the more mid range colours.

The ground was painted the usual warm grey (see earlier posts for more description on this) and a little fence was added in the open space.
As you can see in the picture, I've gone for the split logs again, similar to the previous Place in the Sun post. This was made with balsa dowel that had been given an brown ink wash and then split with a scalpel to produce the effect. They were glued down with wood glue and left to dry properly.

I forgot to take a progress shot of applying the growies but the process is quite simple. 2-3mm static grass is applied to areas of watered down wood glue with my fingers. The grass is clumped between fingers and thumb and then 'dabbed' in place; leaving a fair amount of grass when doing so. When dry, the model is given a good shake and the foam flock is added with neat wood glue and left to dry overnight. A few choice tufts are placed here and there, again with wood glue but applied with tweezers (I have large fingers...).

The buildings were sprayed with Games Workshop Wraith Bone. I usually use Colour Forge but my usually supplier had run out. The whole building was given a watered down ink wash of GW Agrax Earth but done in sections so it didn't dry before being able to be wiped off. A drybrush of Pro Acryl Titanium White was done all over the walls and the windows were picked out.
The roof was washed in neat GW ink and then drybrushed in a creamy white tone to bring it all together.

The barn was sprayed with Colour Forge Trench Brown and given an ink wash of GW Agrax Earth. When dry some heavy 'damp' drybrushing was given to all the wood using progressively lighter tones. It can be good to mix the tones as it gives the wood a more natural appearance. The door supports were picked out in a gunmetal and the rivets/nails in silver.
A little bit of string was added with a small brass wire hook at one end and attached with thin superglue.
A couple of 'additions' were glued down with wood glue and then the whole thing was varnished with Colour Forge Matt Varnish spray.
Hopefully a useful bit of terrain and the gallery below shows some more angles plus a few scenic shots. Part of the prep for Salute will be playtesting the scenario so there will be plenty of photos from that in a future OSHIROblog post.
cheers
James
OSHIROmodels


Simply outstanding.