
Crusades away!
- OSHIROblog

- May 23
- 4 min read
Updated: Jun 28
lI have a very slow burn 1st Crusade project on the go and have amassed a fair few figures so far (couple of pictures in the gallery below) but haven't really had time to sort out some terrain for it.

This project was the main reason behind the recent buildings range but also, I had the intention to do them to go with the Arabic shrine that was released a while ago. As always, there are plans to add to the range over time.

As mentioned in previous tutorials, I generally have a good idea of what I want layout wise before starting. Sometimes I'll do a little sketch to iron out the details (this can be very useful, even if you know what you're doing) but in this case, it wasn't needed.
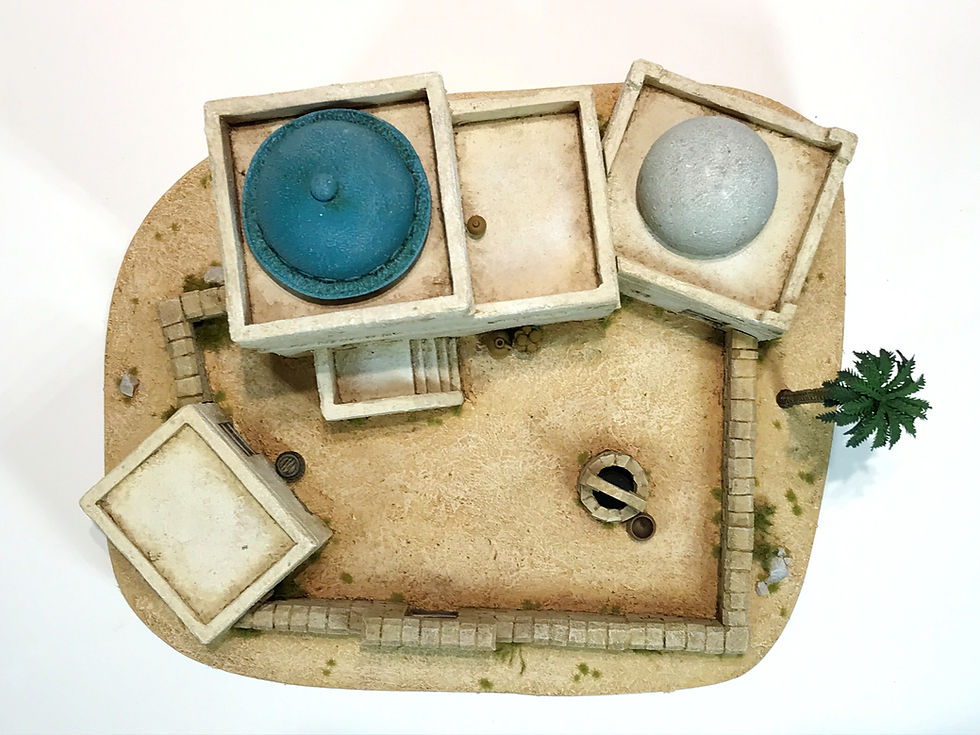
Everything was cleaned up and various holes were filled (as these are mostly mis-casts). The small house top left was cut at an angle and some of the wall ends were as well to help lose the regularity.

The base was cut from 3mm mdf after I had laid everything out and given a chamfer. I used a small, desktop disc sander for this but you can use a scalpel.
The walls and buildings were stuck together after everything had been placed on the base. This takes a bit of faffing to get the positions right so I generally find placing weights on the large buildings first helps a lot as they don't move. Once everything is where I want it, their positions are roughly marked out on the base and they are primed.

I used Colour Forge sprays for the priming with Wight Bone for the buildings and Ossified Earth for the walls. The two domes were painted in white and light blue respectively.
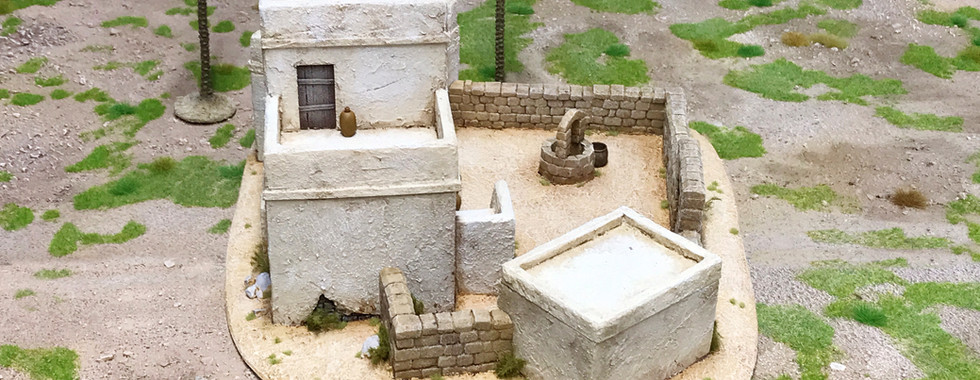
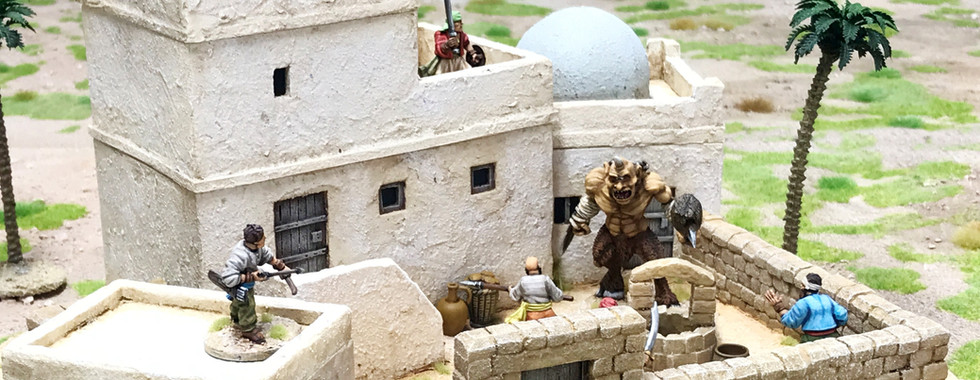
As the roofs are removable I add some 2mm greyboard to the bottoms of the upper floors and roofs to help keep them in place whilst gaming. We tend not to use the interiors of buildings much when playing but as these will also be used for our upcoming Sinbad games then accessible interiors might prove useful.

Once the primer was dry and the wood was painted (GW Gorthor Brown), everything was given a wash of watered down GW earth ink. For lighter coloured buildings I tend to use a 50/50 mix of water to ink.
The wooden areas were given a neat wash of the GW earth ink as the watered down one doesn't quite have enough strength in it. Whilst the ink was wet, everywhere was given a light wipe with tissue to take off most of it but areas were left in the recesses.

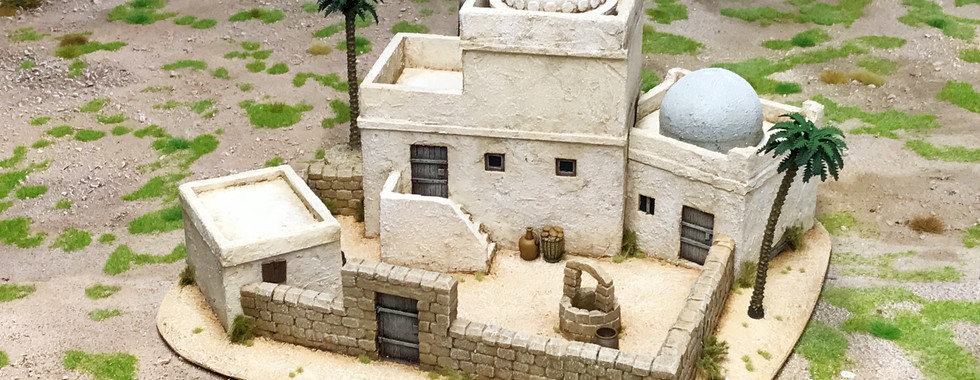
When the ink had dried thoroughly the buildings were given a light drybrush with Pro-Acryl Bold Titanium White. I find this works well for this type of building as other whites can look slightly grey when drybrushed on. The walls were given a drybrush of a light grey and the wood had GW Morghast Bone and Flayed One Flesh.
The buildings had their windows touched in with a very dark grey and everything was stuck onto the base.

I used some ready mixed wall filler from B&Q to blend in the bottoms of the walls with the base and to also add some slights 'drifts' in the corners to represent built up sand. Once this had dried I added my usual gloop texture all over and left it for a day or two to go off.
The ground was painted with one of my groundwork highlights; it's a warm tan colour, and this was given a water/ink GW Reikland Flesh wash. After leaving for a day again the whole base was drybrushed with a very light tan.

Adding foliage, tufts etc is one of my favourite parts but with this being mainly in the desert there's not much opportunity to do so.
Some 2mm Gamers Grass (GG) 2mm tiny light green tufts and some GG spiky green were added. The spiky green were made smaller by tearing them apart and adding individual stalks to the base. There were a couple of small stones dotted about and picked out in grey.
I also added some additions to help give a lived in impression (the jars etc will be released soon) and I thought a ubiquitous palm tree might be a nice touch.
Everything was given a couple of coats of Colour Forge matt spray; leaving a day or two in between coats.
I hope again that this tutorial has proven useful for your own builds. The only limit really to this sort of thing is your own imagination.


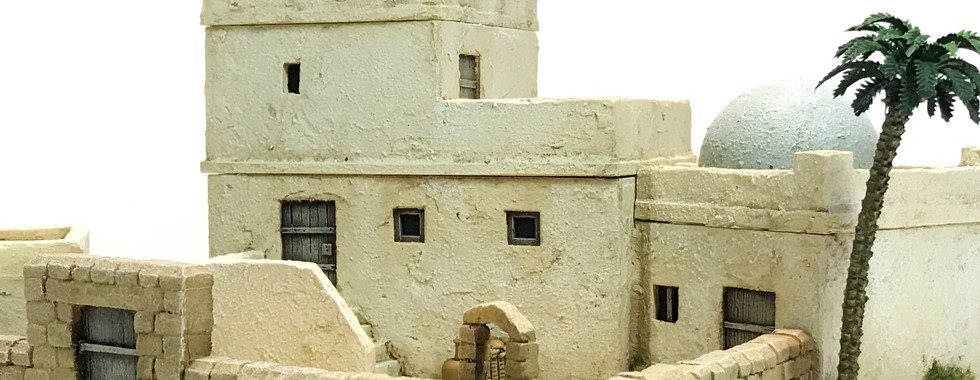


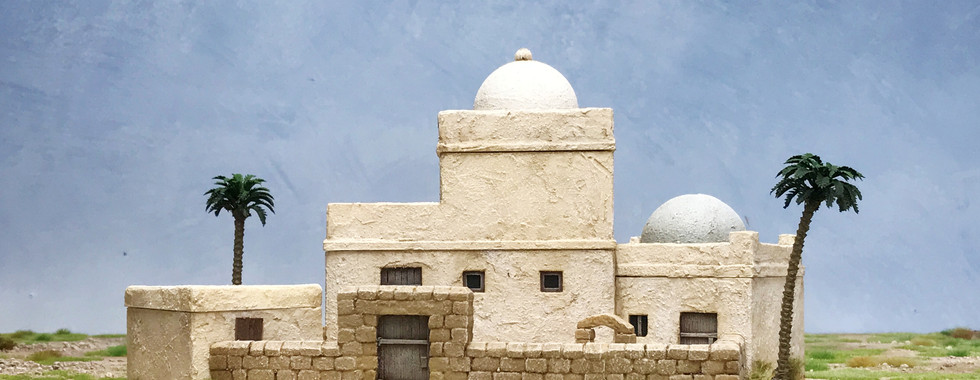


One last note is that I had to swap out the larger dome for the white background photos as it was too washed out. I use Photoscape X pro for my photo editing but I'm certainly no photographer and tend to stick to the same type of photo and editing (curves, colour enhance, autocorrect etc).
cheers
James
OSHIROmodels


A great tutorial, will be "borrowing" these ideas. Thank you for sharing
Excellent tutorial! I have a few of those buildings I’ve purchased from you and it’s certainly given me some inspiration as to how to group them together 😀👍🏻